Cell-based assays.
There are plenty of things need to be considered while performing it, like type of reaction, incubation time and temperature, the correct time to add the reagents, the measurement setups, and most importantly, the reason WHY you are doing that particular assay!
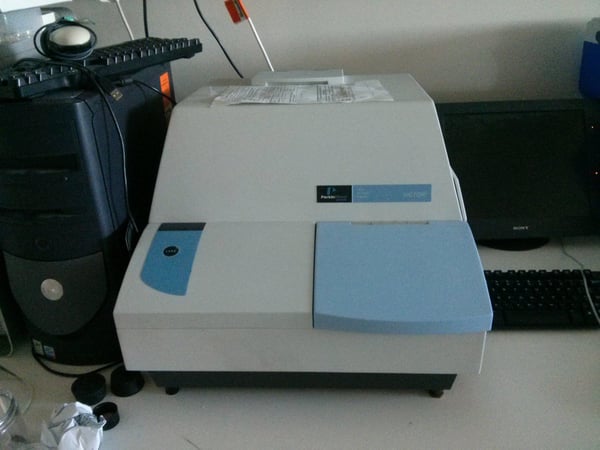
Here are the many cell-based assays that I regularly do in my day-to-day lab work. I use a Victor 3 plate reader from Perkin Elmer 😀
MTT assay
![IMG_20200716_153022[1]](https://www.miss-academia.com/hs-fs/hubfs/IMG_20200716_153022%5B1%5D.jpg?width=600&name=IMG_20200716_153022%5B1%5D.jpg)
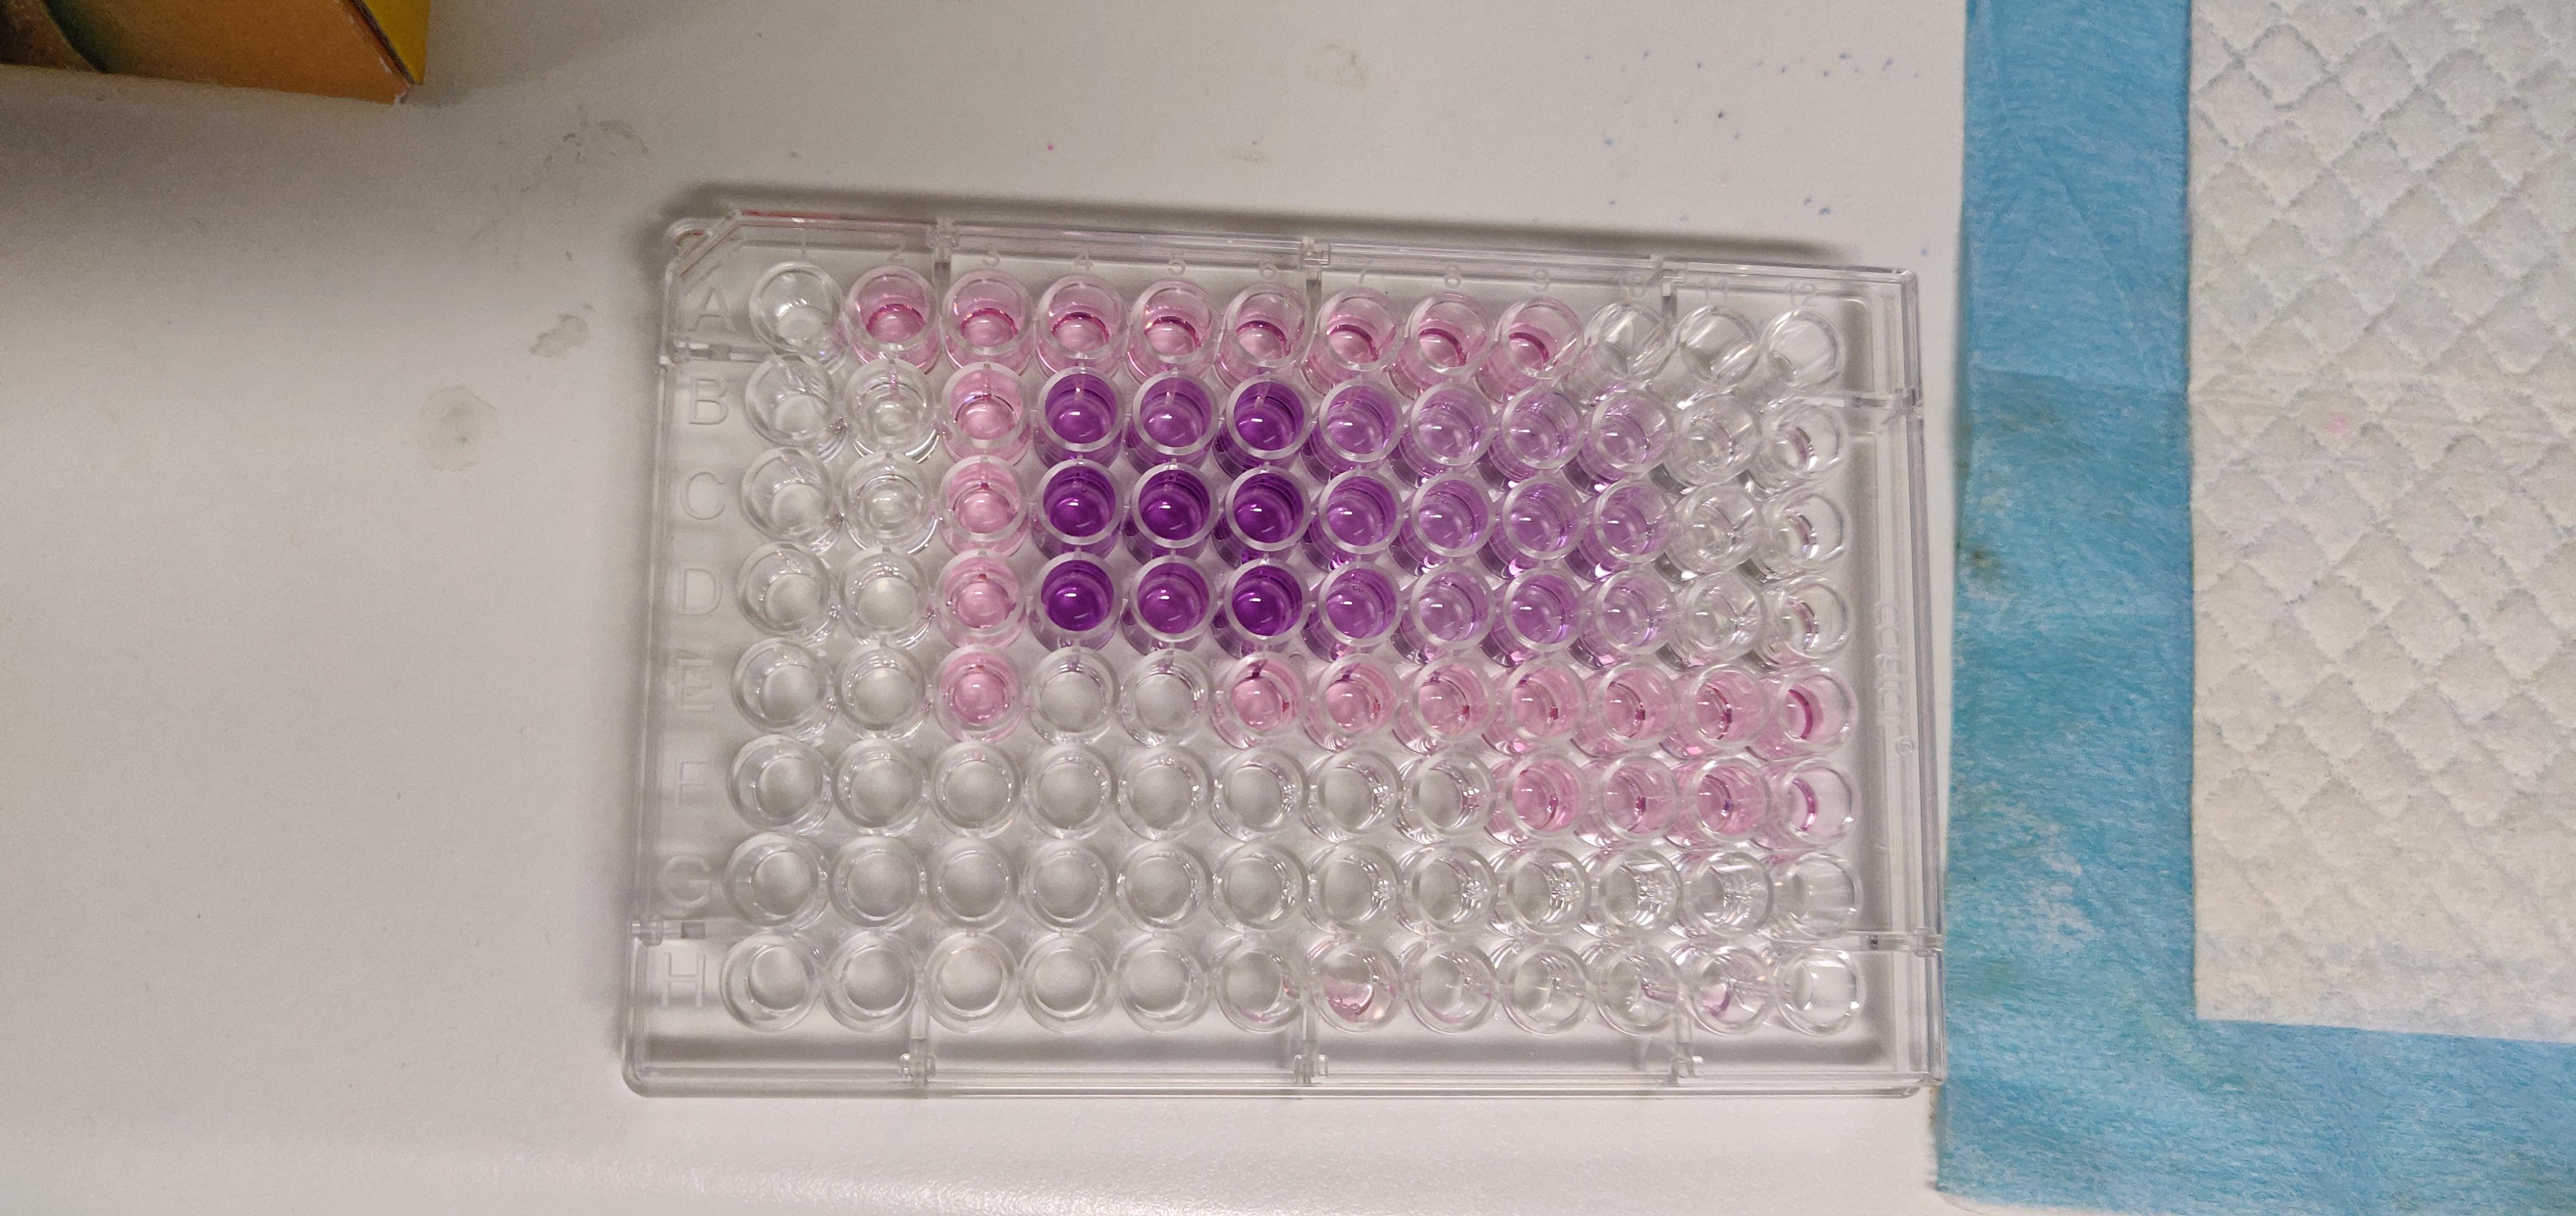
MTT assay is very popular for studying cell proliferation, or toxicity of a particular drug/compound. The principle relies on the cells metabolic activity, that is the activity of mirochondria oxidoreductase to convert the MTT (3-(4,5-dimethylthiazol-2-yl)-2,5-diphenyl tetrazolium bromide) into the purple formazan. the resulting formazan can then be solubilized in DMSO which the absorbance then can be measured at 590 nm, reflecting the cell number.
Here is the step by step on how to perform MTT assay:
1. Prepare MTT stock by dissolving 50 mg of MTT (powder) in 10 ml PBS. This stock concentration is 5 mg/ml. It can be stored in -20 C for long term but avoid storing it in 4 C for few days.
2. On the day of the assay, prepare MTT solution by diluting 1 ml MTT stock into 9 ml medium, to make the concentration 0.5 mg/ml.
3. Retrieve your cells in the well plate. remove medium from all the working wells.
4. Add 200 ul of MTT solution to the wells. Incubate for at least 3 hours in the dark at 37 C.
5. After adequate time of incubation, retrieve the plate. remove MTT solution completely from the wells. if you seed cells at high density per well, you should see some purple crystals formed in the bottom of the well. dissolve the crystals by adding 100 ul DMSO per well.
6. Tap the plate on the side gently to help dissolve the purple formazan.
7. Take the plate for colorimetric assay. Set the filter to measure at OD 590 nm .
Cyquant proliferation assay
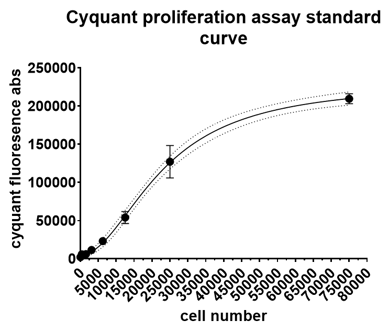
Cyquant assay is a very reliable assay to count cell number over time, as this label the DNA and detect the signals from labelled DNA which basically indicates the number of cells. The absorbance given from this assay can be correlated with the absorbance from the standard curve.
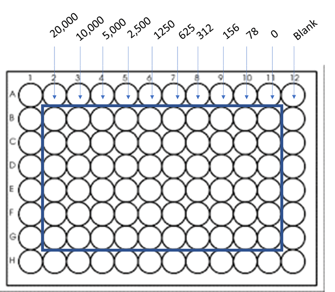
1. To start the assay, have the cells in a 96 well plate prepared at least the day before or allow few days for cells to proliferate or to be treated with any drug based on your research aim. Remember to also prepare the plate for standard measurement containing serially diluted cells
Standard can be prepared by plating cells in the following layout:
2. On the day of the assay, prepare the Cyquant reagent by diluting 22ul of Cyquant Reagent A to 11 mL of 1x HBSS (Hank's Balance Salt Solution), included in the kit.
3. Retrieve the cells in the well plate. Remove the medium from the well. Add 100 ul of Cyquant reagent to each well.
4. Incubate this in the dark, in the incubator for 30-60 mins.
5. Read the absorbance for Cyquant assay using the plate reader with excitation at 485 nm and emission at 530 nm.
6. Interpolate the standard curve and calculate the unknown cell number by inputting the absorbance value into the standard curve. For reference, standard curve will look like this:
BrDU proliferation assay
This is also a proliferation assay that is based on colorimetric measurement instead of fluorescence. It relies on the binding of the BrDU to the DNA and the detection of the bound BrDU by anti BrDu antibody. The most common BrDu kit used can be found here. The kit contains various reagents that need to be used at different time of the assay. Each of this is numbered and may need to be diluted.
1. Prepare the cells in 96 well plates and treat them according to your research aim.
2. On the day of the assay, prepare the BrDU labelling reagent by diluting it with culture medium (1:100) to make a concentration of 100 uM. If you have cells culture in 96 well plate with 200 ul medium per well, 2 ml of BrDU labelling reagent is needed. Add 20 ul of BrDu labelling reagent to each well. Incubate for at least 3 hours.
3. Remove the medium with labeling reagent and add Fix Denat solution into the wells (200 ul per well). Incubate for 30 min at room temperature.
4. Remove the Fix Denat solution by inverting and tapping the plate on to a redi wipe.
5. Dissolve the Anti BrDU POD in 1.1 ml double distilled water. This can be aliquoted and stored in -20 C freezer for later use. Add 100 ul per well this Anti-BrDu POD solution. Incubate for 90 mins at room temperature.
6. Remove the antibody solution and wsh the wells 3 times with 1X PBS. Remove the last wash completely by tapping on to redi wipe
7. Take the plate to the plate reader. Set the plate reader to dual filter, 370 nm with 492 nm reference filter (substract mode).
8. Add 100 ul of Substrate solution to each well. Wait few minutes until reaction takes place. Measure the absorbance every 5 minutes as the color develop stronger.
9. Remember to have wells replicate that contains background control (only cells without labeling reagent, but wadded with anti BrDu) and blank (contains no cells, only labelling and anti BrDU).
Luciferase assay
This assay is based on the activity of a luciferase gene that is present in or have been inserted into the cells. The luciferase gene can be coupled as a promoter with our gene of investigation to study how this gene can get turned on or off from a certain treatment (e.g pharmacological, mechanical). The design of the luciferase gene promoter and the coupling of your gene of interest can be done through a commercial lab that offers to produce a personalized luciferase assay kit. The one I mostly used is The Active Motif Luciferase assay kit.
Let's delve into an example of my experiment:
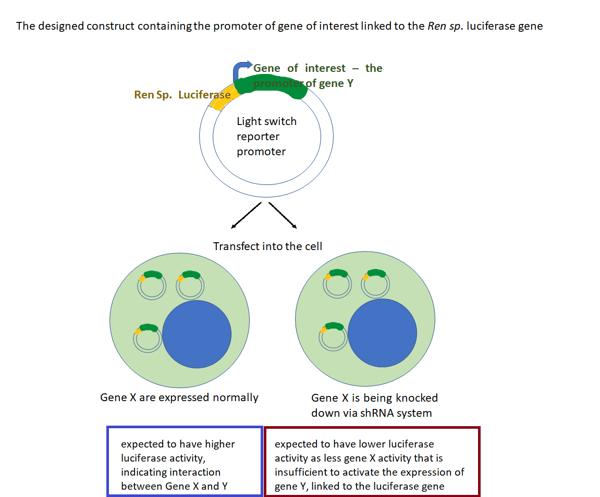
- I am interested in a gene called X and whether this gene affects the expression of another gene (gene Y) at the transcriptional level.
Usually from a previous experiment like chromatin immunoprecipitation assay (ChIP), we can see whether there is a reduction in the expression of a gene Y which also affects the expression of Gene X.
It is important to find interaction of genes this way especially when Gene X has been widely known to be responsible in the progression of cancer. So, the next step is to find out whether gene X activates the expression of gene Y by binding to the promoter of gene Y by doing luciferase assay.
- First, prepare the cells with a well-established knock down system, such as the shRNA stable expression of gene X, to easily knock down this gene. The shRNA system works in a way that it is activated by a certain drug. So, when treated with this drug, gene X will be knocked down due to the shRNA. This can be done on the following days.
- Then, insert the Luc gene construct linked to the promoter of gene Y. Incubate for some days
- On the day of assay, remove medium in the wells, and freeze cells in the well plate at -80 C for 2-3 hours or overnight.
- Prepare the reagents for assay by thawing the solvents and substrate provided in the kit. The lyophilized substrate (usually comes in black glass tube) should be dissolved in 100 ul solvent and can be aliquoted and stored in -80 for future use. Add 100 ul per well of this light switch reagent. Incubate i=for 30 minutes and read the luminescence.
- If you choose the dual assay kit, it comes with Biolux Cypridina TK control reagents which serves as a control for your luciferase gene activity. Similarly, you need to dissolve the biolux substrate with its solvent, and add 50 ul per well to the cells as they thaw. Incubate for 30 minutes and read the luminescence


